Background info
If you have the same problem as we had with cloud shell storage account scattered all over our azure platform.
This post is about how you can move your cloud shell storage account to a new storage account.
I would recommend that you guys keep it to one or two resource groups to not end up with the same problem anyway.
We can also create a policy with denies the creation of storage account with the automated tag that gets added to the a cloud shell storage account “ms-resource-usage:azure-cloud-shell”
Move the files
Some users might have saved files thus as picture, script, connection strings and so on.
If a user wants to cope the whole cloud shell, drive this is how you could do it.
If a user don’t have anything that he or she wants to save simply follow steps nr 3-4 and 13 (delete the old storage account)
Copy paste cloud shell
- Copy the name of the storage account to notepad or something else, you will need it later on.
- Open cloud shell select bash and write: df

The storage account name will be seen as showed in the picture above followed by the file share name. - In the cloud shell write clouddrive unmount and say y as shown in the picture.

- Now create a new cloud shell/Storage account in the subscription of you chose and the same for resource group. Name your new Storage account and fileshare to something meaningful. Example: cloudshellyourname
- Now verify that the new storage account and file share is created.
- When you have verified that the storage account and file share exist, from cloud shell now run clouddrive unmount and say y as shown in the picture shows above again.
- In the Azure portal navigate to the old Storage account and open: Open in explorer (if you dont have the application download and install it)
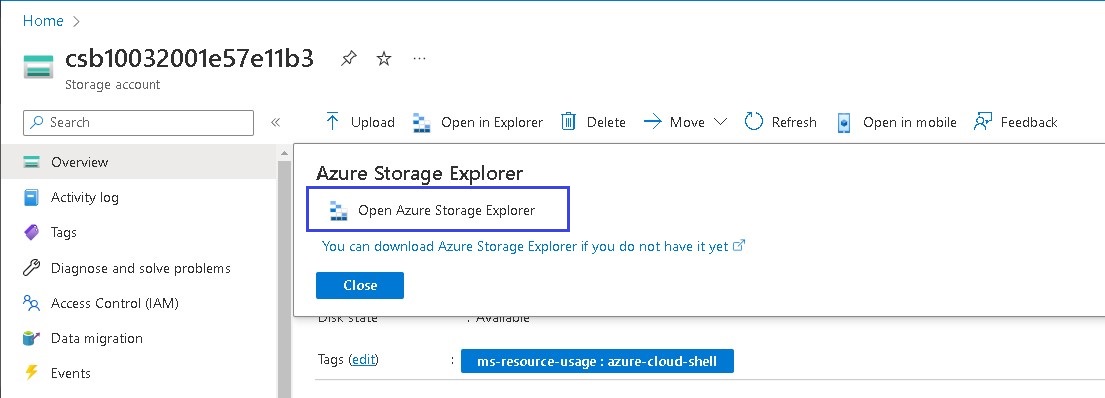
- Login to Azure Storage Explorer and navigate to your old Storage account > file share > image and copy the image file.

- Now navigate to your new Storage account > file share > image and paste the copied image file.
- Replace the image file and Apply to All Conflicts
- Now from the portal open cloud shell and attach the newly created storage account
- Verify that the files are located in your new storage account/cloud shell. example command dir
- Delete the old storage account.
Referense:
https://learn.microsoft.com/en-us/azure/cloud-shell/persisting-shell-storage
