Problem
If you are in the same situation as I was this can help you and your company to clean up old resources.
We have some subscriptions where the whole company can try out stuff and just play with Azure.
This kind of subscriptions is for labing and testing and the resources should be short lived.
Sadly, this kind of resources often gets forgotten and just stays there and cost money for the company and no one knows if this kind of resources can be deleted.
Solution
- Just deploy the policy and add the RBAC for the Automation account on subscriptions where you know nothing of importance is running.
All the code for this auto cleaner can be found in this github-repo: Auto-Cleaner
It is built out of two components:
- A policy that adds a DeletionDate tag with plus 30 days to new resource groups.
And adds the tag when an update is performed on a resource group with 30 days from current date to the tag. (It refreshes the date on the tag DeletionDate) - Automation account that deletes resource groups with the tag DeletionDate on current day.
The Policy
The policy has two parameters:tagName = defaultValue: DeletionDate (string)
tagValue = defaultValue: 30 (Integer)
The policy is of effect modify. This is because we then get the possibility to remediate old resource groups, so they also get the tag and ultimately gets deleted.
Deployment
- Open the Azure portal and navigate to Policy > Definitions. Click + Policy definition
- Chose a location (Example under a management group or subscription)
- Name the policy whatever you prefer.
- add a Description.
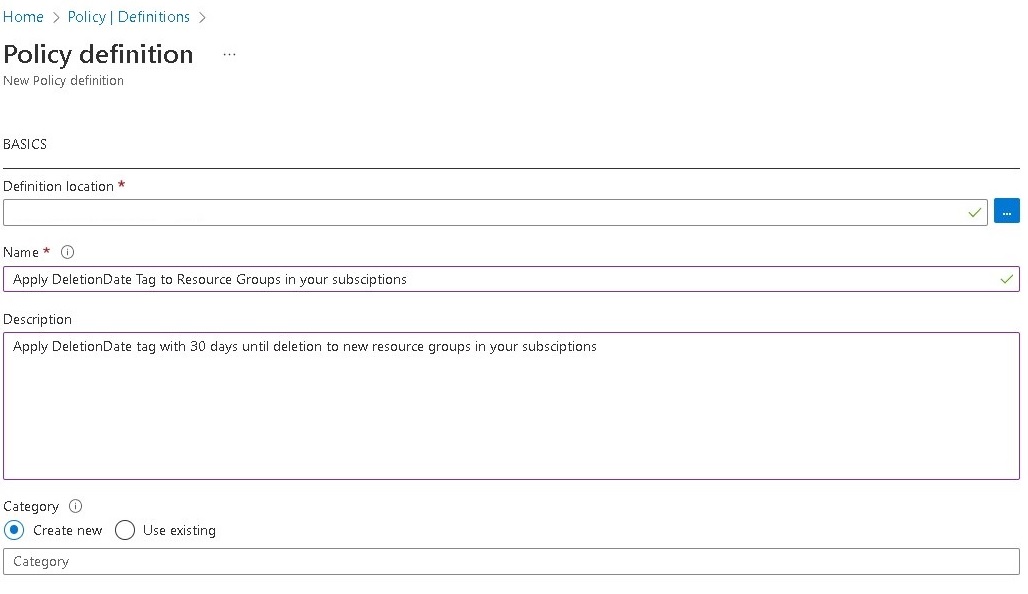
- Copy the content of file Copypolicy.json to POLICY RULE and Save
If you need more time the 30 days change the value of ("defaultValue": 30) to your liking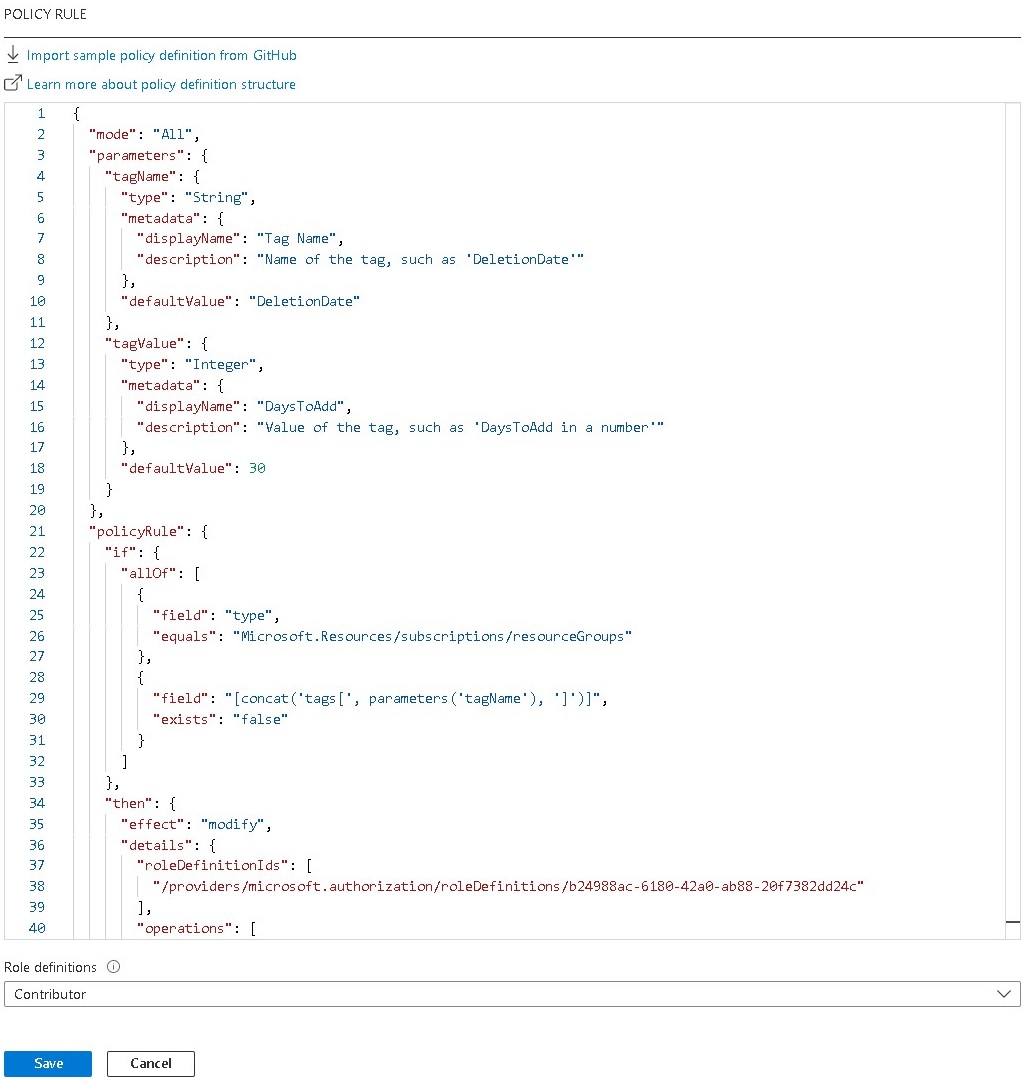
- Now we need to assign the policy so click Assign
- Scope the assignment to a Management Group or Subscription.
- Give the assignment a name and Description and Enable it.

- Under Remediation chose System assigned managed identity or create a User assigned managed identity.
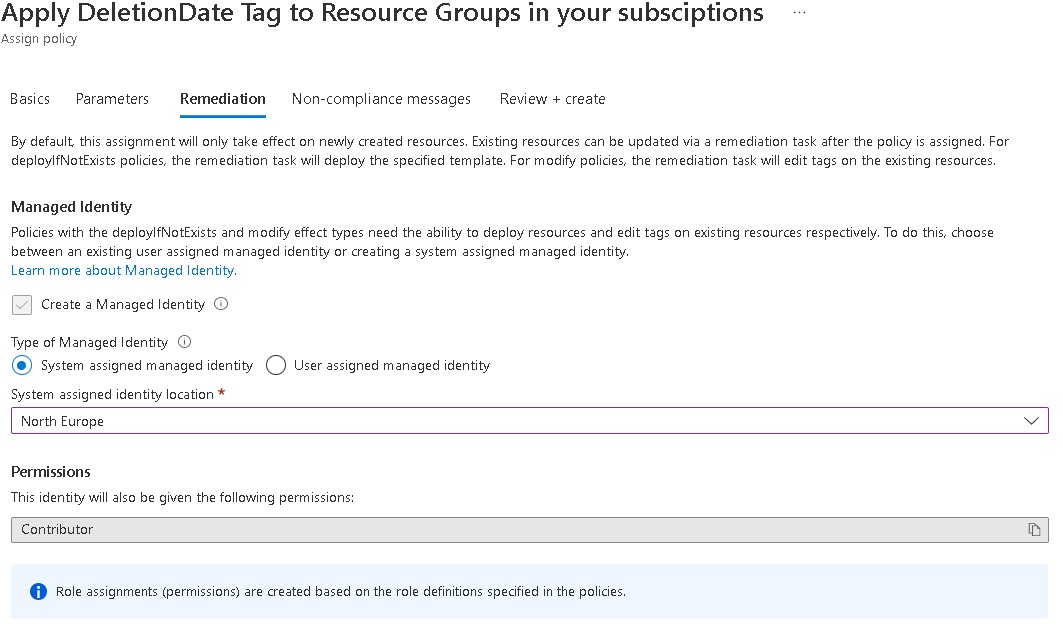
- Click Review + create > Create
- You can test the policy by just creating a new resource group where you have scoped the policy assignment and see if it automatically adds the tag. If it does, then everything is working as expected.
- Now if you want to create a Remediation task do it to add the tag to old resource groups.
The Automation Account
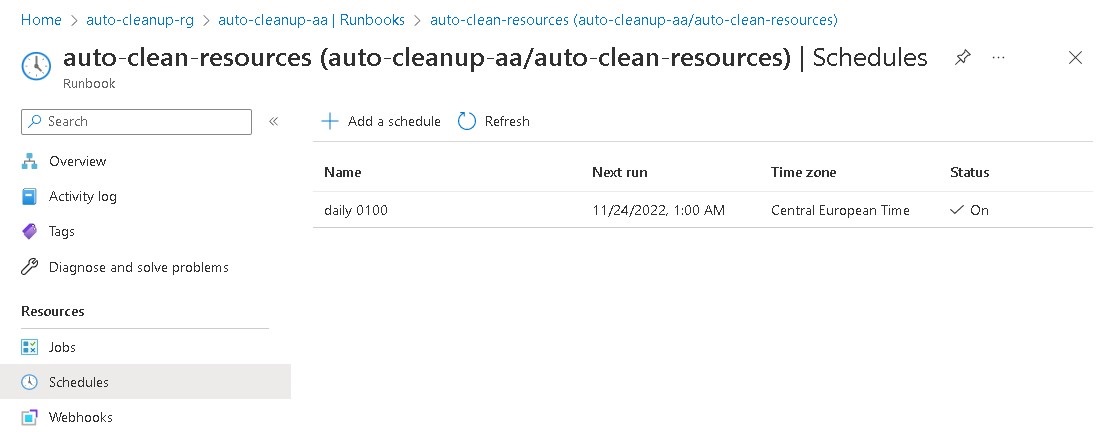
The automation account has one runbook that is scheduled to run at 01.00 AM every day.
You can deploy everything as it is from the repo described below but you need to manually add the powershell scrip to the runbook.
Or change runbookType: 'PowerShell7' to runbookType: 'PowerShell' in file automationAccount.bicep and just use the script import.ps1 in folder extra-config. (you need to uncomment (# $scriptPath and # Import-AzAutomationRunbook)
Everything works fine with both PowerShell and PowerShell7 but you get more output/info from PowerShell7 so I would recommend it.
resource automation_account_auto_remove_runbook 'Microsoft.Automation/automationAccounts/runbooks@2019-06-01' = {
  parent: automation_account
  location: location
  name: 'auto-clean-resources'
  properties: {
    logActivityTrace: 0
    logProgress: true
    logVerbose: true
    runbookType: 'PowerShell7' // here you can go with PowerShell and use the import.ps1 script. powershell7 gives more info from the runbook but then you need to add the script manually.
  }
}
RBAC
The account or the service principal that deploys the automation account need the following RBAC roles on the scope of the deployment.
For example, Contributor and User Access Administrator on the management group where you deploy the automation account.
- Contributor
- User Access Administrator
Deployment
- Copy everything either the hole github-repo Auto-Cleaner or everything under bicep-deploy
- Open the copied files/folder in visual studio code. It should look like this picture below.

- Create a new repo and add a github action or just deploy it locally.
- Deploy everything with commands like this:
cd .\bicep-deploy\
az login
az deployment mg what-if --management-group-id yourManagementGroupId --name rollout -f .\main.bicep -l westeurope
az deployment mg create --management-group-id yourManagementGroupId --name rollout -f .\main.bicep -l westeurope - Add the auto-cleanup.ps1 script which is located in extra-config to the new runbook auto-clean-resources as seen in the picture below and Save.

- Or run the script import.ps1 from folder extra-config or publish the runbook and add the schedule manually. It should look like this when its finished.
- If you want to try it out create a new resource group and change the date on the tag DeletionDate to current date.
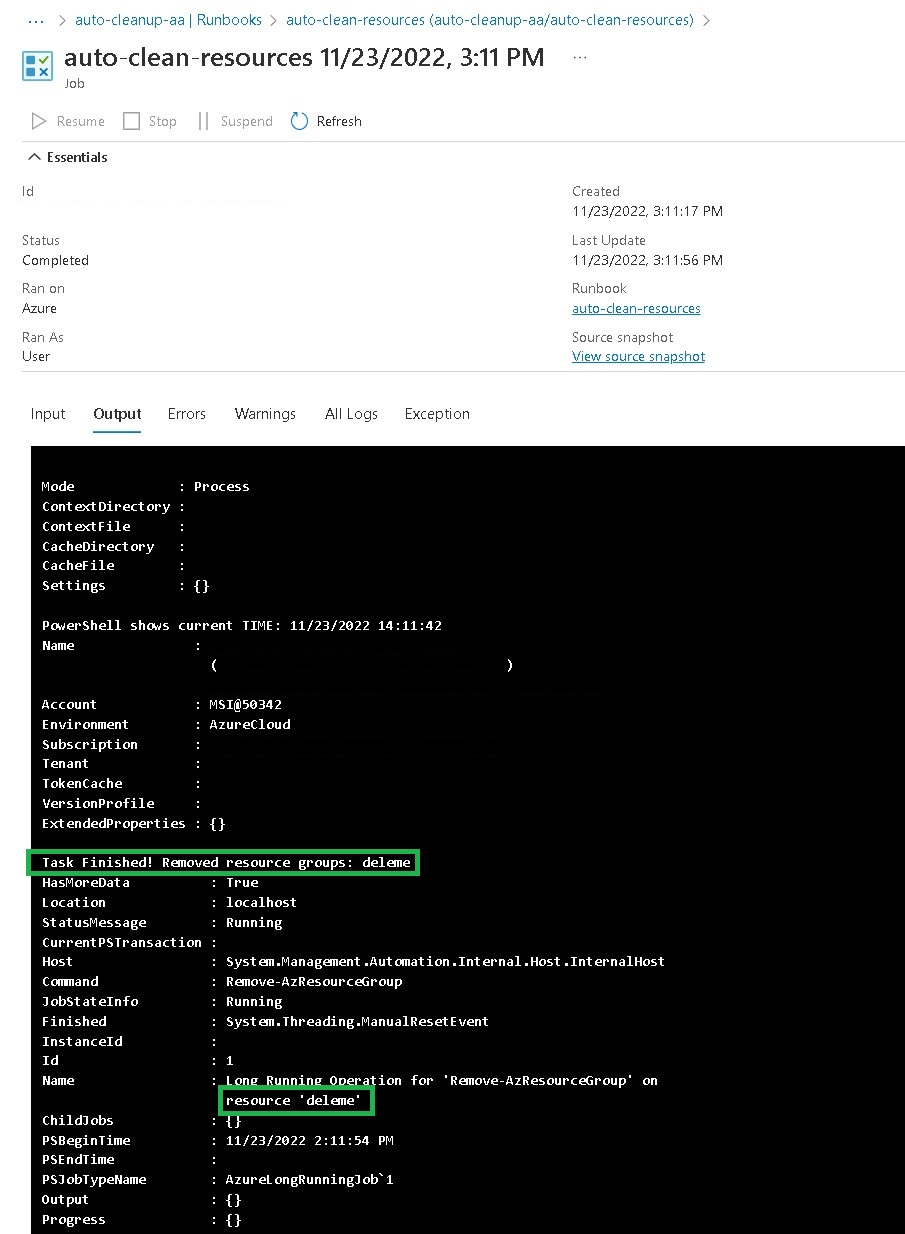
- Start the runbook. The output should look like this.
Extra-config
In extra-config under policy there is an example on how you can deploy the policy just with code: policy
It is also here we find the runbook script: auto-cleanup.ps1
Protect resources from auto deletion
If for some reason you need to protect a resource group, just add more time to the tag as shown in the picture below.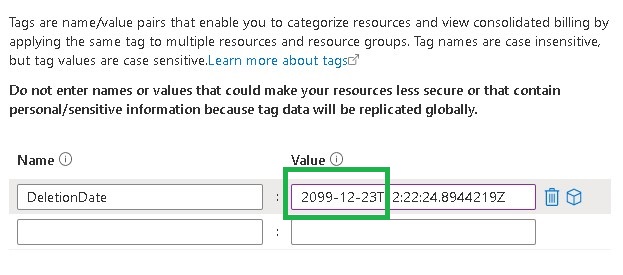
Reference:
https://azurealan.ie/2021/10/04/auto-delete-expired-azure-test-resources/


